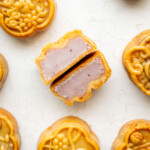
Baked Taro Mooncakes
These baked taro mooncakes are the perfect mooncakes for your Mid-Autumn celebration if you're looking for something a bit traditional and unique at the same time. These mooncakes have that traditional tender mooncake skin filled with a velvety homemade taro paste. In this post, learn how to make these beautiful pastries at home and get some tricks on how to make them consistently each time.
Servings: 11 mooncakes
Calories: 187kcal
Ingredients
Mooncake Skin
- 84 g golden syrup
- 25 g peanut oil
- 7 g lye water
- 120 g all purpose flour
Taro Paste
- 375 g taro root cut into 1-2 inch thick pieces
- ½ cup + 2 tbsp coconut milk full fat
- ½ cup granulated sugar
- ⅛ tsp salt
Instructions
Prepping the taro paste and mooncake skin dough
- First make the taro paste. Steam 375 g of taro root for 30-35 minutes until a fork easily pierces through each piece.
- Using a potato ricer or a fork, mash the steamed taro root and add to a fry pan. Follow with ½ cup + 2 tbsp of coconut milk, ½ cup of granulated sugar, and ⅛ tsp of salt. Turn the heat to medium and cook until the sugar melts and the taro paste starts to pull away from the pan. The taro paste should be a deep purple color. If it is a light purple color, it is undercooked.
- Let the taro paste cool at room temperature for at least 30 minutes and then place in the fridge to cool completely. In all, this should take about an hour.
- While the taro paste is cooling, make your mooncake skin dough. In a bowl, combine 84 g of golden syrup, 25 g peanut oil, 7 g of lye water, and 120 g of all purpose flour. Mix well until a golden dough forms. Cover and let it cool in the fridge for 30 minutes.
Forming the mooncakes
- Once the ingredients are cool, take out your ingredients. This should include both your filling and skin.
- Using a scale, weigh out the ingredients for each mooncake. Place the filling onto the scale and adjust until it reaches 30 grams. Next, add some mooncake skin until the scale reaches 50 grams.
- After you have weighed out the ingredients for 1 mooncake, form the mooncake. Roll the filling into a ball. Set it on a plate.
- Next, roll the mooncake skin into a ball and flatten it into a thin disk. Enclose the filling with the skin. The disk won’t completely enclose the filling, so you’ll need to gently press the outside of the ball to stretch the skin over the filling. The motion you want to make is similar to how you would put a rubber band onto a ball or a cylinder. You roll your fingers over the rubber band until it reaches the position you’re aiming for. Once you get skin around the filling, roll between your hands to form a smooth ball.
- Repeat this process for every mooncake until you run out of filling or dough. Now it’s time to put them in the molds! Prepare a baking sheet by covering it with parchment paper. Make sure to have your molds ready.
- Coat the mold with a light layer of flour. Shake out the excess. This will help the mooncake to release easily from the molds.
- Place each mooncake into the molds and press down firmly onto the baking sheet. Next, lift the mooncake a little bit and push it out of the molds. Repeat this for every mooncake.
- Let the mooncakes cool in the fridge for at least 30 minutes to an hour. I like to cool mine for an hour. The purpose of this step is to make sure the pattern on top holds in the oven.
Baking the mooncakes
- Preheat the oven to 350 degrees F (177 degrees C).
- Bake the mooncakes for 5 minutes.
- Make the egg wash by combining 1 egg yolk and 3 tbsp of whole milk. Whisk until smooth.
- Take the mooncakes out and brush them lightly on top with the egg wash. Make sure this egg wash is very light. It should just look like the mooncake has a shiny sheen. Otherwise, the pattern gets distorted.
- Put them back in the oven and bake for another 13-15 minutes until they are golden brown.
- Cool them for 5 minutes on the baking sheet and then transfer to a cooling rack to cool completely.
- Let them rest in the fridge for at least 4 hours before eating. The skin will be hard, but as it rests, the moisture from the filling will absorb into the skin, creating that soft exterior we all know and love.
Notes
- Store these taro mooncakes in an airtight container in the fridge. They can be stored 1-2 days.
- If the mooncakes become oily the next day, bake for 2-3 minutes at 350 degrees F to dry them out.
Nutrition
Serving: 1mooncake | Calories: 187kcal | Carbohydrates: 33g | Protein: 2g | Fat: 5g | Saturated Fat: 3g | Polyunsaturated Fat: 1g | Monounsaturated Fat: 1g | Sodium: 33mg | Potassium: 258mg | Fiber: 2g | Sugar: 15g | Vitamin A: 26IU | Vitamin C: 2mg | Calcium: 20mg | Iron: 1mg